I have finally started making windows, and the sills are the first step. This has been a long time coming, and I have a heap of work ahead of me for the windows. Before we started the house we had decided to make our own windows, because the cost of buying professionally made windows was just way too expensive. It was going to cost us $30,000 for double glazed windows for the workshop, and $39,000 for the house – and that was the cheeper end of the quotes we got. The most expensive was $60,000 just for the workshop!
We want timber windows. Primarily for the aesthetic, but also because of the thermal properties of wood. Whilst PVC windows are probably the best thermally, I do not particularly like them, and am not even sure if we could get BAL-29 rated PVC windows. Not a huge fan of aluminium windows either – they would not suite the look of the house, and we would have to get aluminium clad wooden wooden frames because AL is a terrible insulator. These would prove to be expensive also.
So, timber it is; and we must pick from a list of 7 timber species that have been fire rated and found suitable for BAL-29 and above. We have ended up with Silvertop Ash. Whilst in many cases it looks like Vic Ash, its much heavier.
The window frames need to be 221mm wide to suite the walls we are making. It works out like this:
- 10mm for plaster
- 120mm for studs
- 8mm for ply classing
- 25mm for exteriour foam insulation board
- 20mm for weatherboard batterns
- 38mm for weatherboards & trim
So the sills need to be 250mm to cater for the horns on weather ends of the sill that the window moulding will sit on, and to provide a weather lip over the weatherboards.
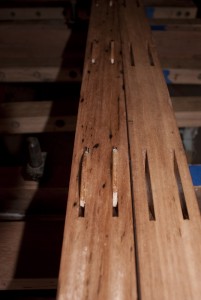
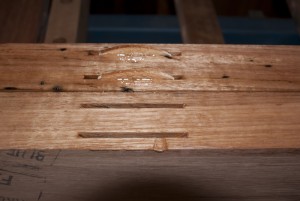
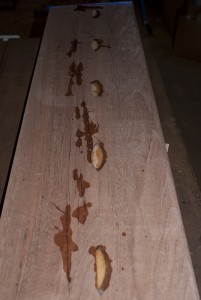
Each sill is made from two pieces of 140 x 45mm stock that is edge jointed together. I am using a router with a straight bit and a 24″ jointer hand plane to do the jointing. Then I put in two rows of biscuits to align them, however in hindsight one row would have been fine. The reason I say this is because when planing the bevel on the sill on some boards I exposed the biscuits because they were too close to the finished surface.
 |
 |
I am using a West Systems epoxy glue for the sills because the join will be exposed to the weather (under paint). I am finding the epoxy easy to work with because it has a relatively long open time when compared to a PVA like Titebond. However the disadvantage is a very long cure time in clamps (8 – 12 hours). With the clamps I have I can only clamp up 2 long sills at a time. Note that epoxy is a gap filling glue, so you do not need to clamp up as tightly as you do for PVA. I brush the epoxy on with a disposable brush.
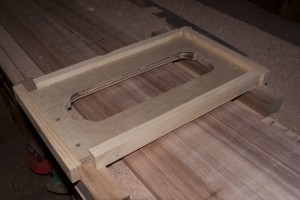
Once out of the clamps the shaping can begin. I have made up a simple sled for my router that rides on a track consisting of an MDF base and two pine rails.
 |
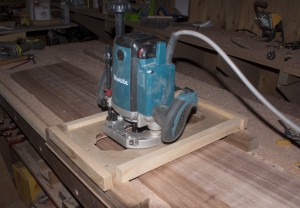 |
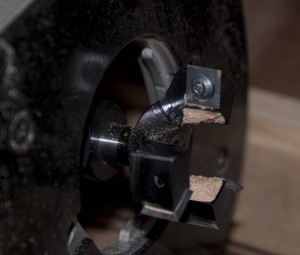
I am using a 3 horsepower Makita router, with a surface planing bit. The bit has 3 replacable carbide inserts, so I get 4 cutting edges per insert before I have to replace or sharpen the inserts. This bit and router combination work very well, and I get only very minor ‘tracks’ in the planed surface which can be belt sanded out.
Whilst I have a thicknesser capable of handeling this size timber, its no good to me because neither surface of the glued up plank is perfectly flat. So running it through the thicknesser would only produce a twisted board out the other end.
Therefore I sit the glued up stock on my sled base, and use small timber wedges to shim out any wobble in the board. Then I surface plane one face, flip it over and surface plane the other face. Once the first face is planed true, I could run it through the thicknesser for the other face. However I am already set up with the router so I just continue on with it on the other face.
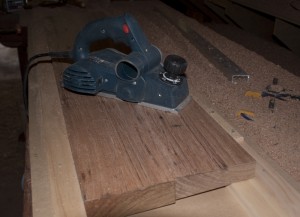
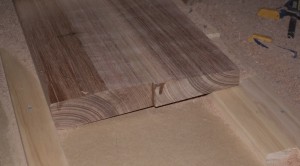
To put the bevel on the main face, which is about 90mm wide, I use my electric planer to rough it in, then set a chock piece under one edge and again use the sufrace planer in the sled.
 |
 |
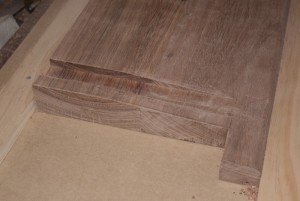
Then I need to cut out the horns at either end, and route a rebate at either end to house the jambs.
 |
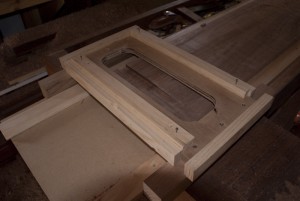 |
The rebates are cut with the router, using a straight cut bit. I again use the sled, clamping it in position on the table. I have fixed side rails to the sled that the router base runs up to, to control the width of the rebate. The rebate is cut only as long as the jambs are wide – 221mm.
I also hand plane a radius on the front edge of the sill, just because I think it looks nicer.
The final step is to cut a drip channe under the front edge using the table saw.
And thats how I make the sills.
I love what you guys are up too. Such clever work and reporting!
Keep up the very good works guys I’ve added you guys to blogroll.