When I do the house, I need to layout and install ALL the posts FIRST, before any walls go up, immediately after the steel beam. All the posts will be set in place and braced, but not fixed in. This allows me to level of all the post tops (or post rebate tops) before they are all permanently bolted in.
I did a post lamination and orientation plan for the workshop. Do one for the house. Do it in Blender so all the sizing and spacing is correct. Do this prior to marking out the slab, as the post locations dictate the pier locations, and vice versa. I made a mistake with pier/post placement with the workshop, so I don’t want to make the same mistake again.
Laminate each post together, run it through the thicknesser to dimension it, and cut the rebates (in that order). Then fit the post to the mounting bracket. Yes, thats right, fit it to the bracket whilst in the workshop, where you can use the drill press to get the bolt hole horizontal and in line with the bracket holes.
This is because I will do the brackets in 2 parts.
Once all the posts are made, use the ‘washer’ part of the 2 part bracket and drill and install all the dynabolts into the concrete. Because of the 2 part bracket, these dynabolt locations do not have to be mm accurate. The main bracket part has oversized hole’s in it so the post can be rotated a bit and slide back and forth a bit to align it. When the dynabolts are installed in the concrete, don’t hammer them all the way in. leave them 15 – 20mm proud.
The dynabolts are M12, with 16mm holes. I am thinking the oversized holes should be 25mm.
When the post in installed, the plate washer is removed from the dynabolts, the post with bracket is lowered in place and braced, then the washer is inserted in the bracket and lowered over the dynabolts, and the nuts are put on. Then the post can be moved a bit to line it up. The dynabolts and brackets are to resist vertical lift, not sheer, so it does not matter that the holes in the brackets are oversize.
These simple braces for the workshop proved to be a pain to both drill the bolt hold for in the timber, and to get perfectly lined up on the slab.
Each post needs a two braces that will be bolted to the concrete temporarily. Each brace needs a turnbuckle type adjustment. These braces need to be positioned so that walls can be built and fixed to posts in a sensible order, and the braces removed once there are either two walls on a post, a wall and a beam, or two right able beams.
Once the posts are installed, ALL the beams are to be installed.
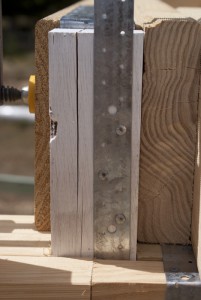
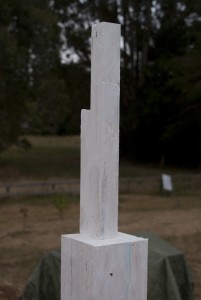
Rebates for beams
Where a post supports both a strutting beam and a bearer, the plans call for the central post laminate to extend up to the top of the strutting beam, so it can be used to tie on the strutting beam with straps.
 |
 |
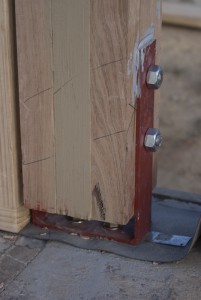
The theory is good, but in practice it sucks because you end up with so many nails in the top 200mm of this post that it just splits open. In the picture above you can see the big vertical split to the left of the strap. That was caused by the nails for the straps on the other side of the post. So, we need a better way to fix the strutting beam to the post.
