Router bits snap easily

This is why I dont like using 1/4″ routers – the bits snap easily.

I mostly use my 1/2” shank router, but for small work its too big and heavy so I use a little trim router that take 1/4” shank bits.

Carbide (the material the bits are made from) is brittle and I accidentally knocked the spinning bit as I lifted the router out of the hinge mortising jig.

$30 down the drain.

Installing a decorative front door

At long last the time has come to install our front door. It has been resized, undercoated, and hinged have been mounted. Its now time to hang it. Lets hope it fits !

Door Jamb Preparation

The key to hanging a door is preparation, and that preparation starts when you build the house frame. Make sure the rough frame is the right size to contain the door jamb, plus a bit of space for packers to align the jamb. The jamb must then be installed perfectly square and level/vertical. If the jamb sides are square to the jamb head and sill, and the jamb sides are precisely vertical, then you are 85% of the way there. Next you must cut your hinge mortises in the jamb and matching mortises in the door, ensuring a small gap at the top and bottom of the door so it swings freely.

If you have sized your door appropriately, then fixing the hinges to the door and the jamb is a walk in the park. If not, then you are in trouble.

Mounting the Door

In this case, I was in luck (i.e. good planning). There was a small bit of stress on one of the hinges, where the jamb had a very minor bow, and perhaps the door was not perfectly flat. It seems to pull up OK.

I used 4 x 100mm stainless steel ball bearing hinges. Most doors use 3 hinges, but I am a bit paranoid as the door was a little heavy.

The door swings nicely, and stays in place wherever it is, so that means the lamb is vertical, both left to right and front to back.

The gap around the door is about right – 3-5mm.

Topcoat Painting the Door

We decided to put the topcoat on the door once it was hung, mainly to limit the dust and bugs that would land on the wet paint. We had already given it 2 good undercoats.

We painted the door with water based paint – exterior semi-gloss paint for the outside face, and interior semi-gloss for the interior. Why use two different paints? To cater for the two different circumstances the different sides of the door will face. The exterior experiences quite a range of temperature and moisture, so the paint needs to be flexible, which is what an exterior paint is all about. The inside needs to be tough and more glossy as it gets knocked a bit and will be whipped down occasionally, thus an interior paint.

We used a good push (Purdy), and it made a world of difference when compared to prior painting experiences with average brushes.

The Results

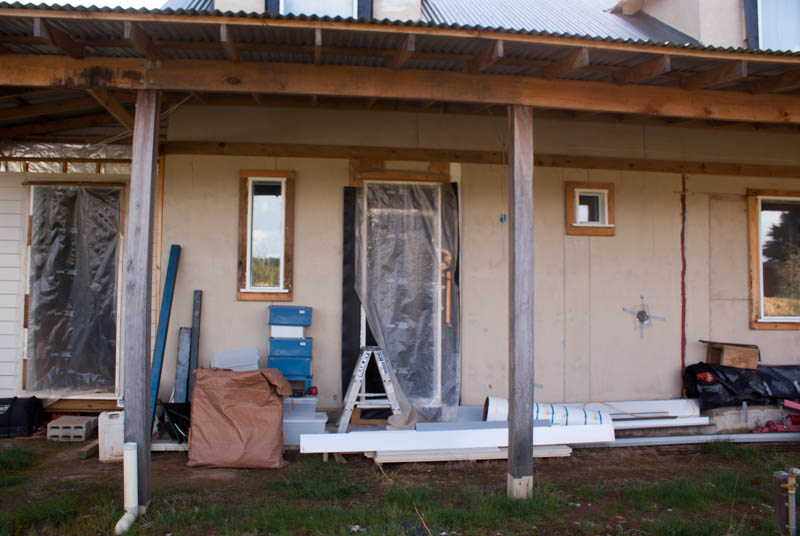
Prior to the door going up, a sheet of plastic covered the entrance.

SONY DSC

This worked quite well, but flapped a bit in the wind, and because it was held in place with battens, you could not open it easily.

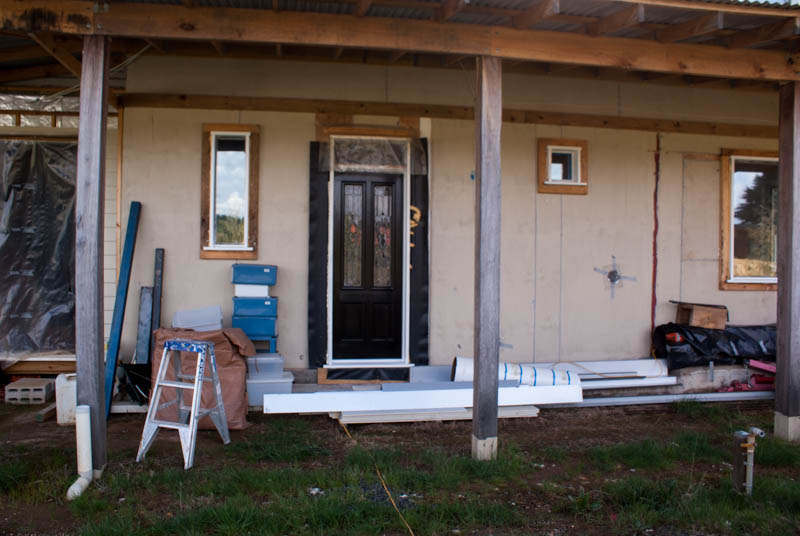
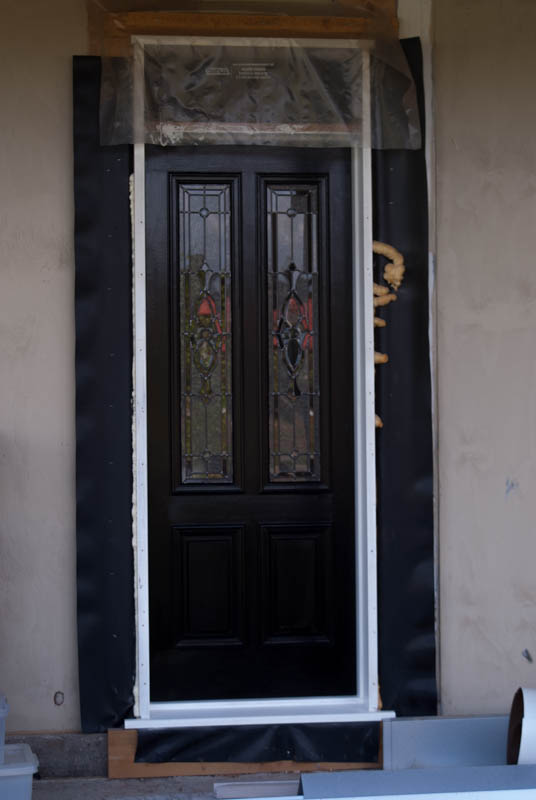
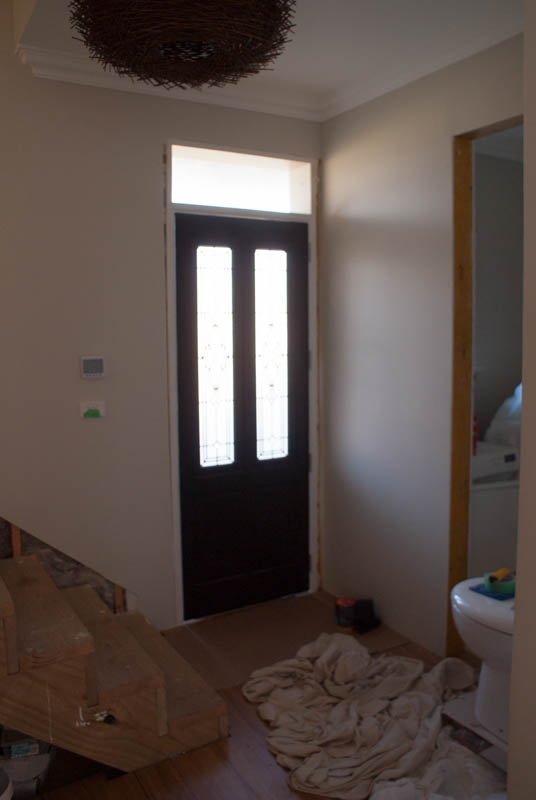
Now, we have a real door.

SONY DSC

SONY DSC

SONY DSC

Now I need to install the handles and weather strips, then put a topcoat on the jambs.

Installing a kitchen sink

We bought a two basin stainless steel kitchen sink, and we need to install it into a temporary chipboard benchtop (a piece of leftover flooring) prior to our real benchtops arriving.

The procedure is no different than installing it into a real bechtop – cut a hole, silicone around the edge, then drop it in place. (for the temporary benchtop we are leaving off the silicone, so we can get it out again). Then hook up the drain plumbing and insert the tap.

We have a problem though, which I did not forsee. Whilst the sink fits within the cabinet, it does not fit between the top door hinges.

We like the sing, so we don’t want to return it and swap it over.

So, the only option is to relocate the top door hinges. I can re drill the large holes for the hinge using my drill press and the appropriate forstner drill bit. I think we will just have to put up with the original holes in the doors that will now be exposed.

Installing Kaboodle kitchen cabinets

Assembling Kaboodle cabinets is relatively straight forward. The instructions are clear and the predrilled holes are well placed. If you have a general sense of how things should go together you wont have too much trouble.

Having a second person to hold things and help turn cabinets over is advised. All you need is an electric screw driver and drill. The drill is required when joining cabinets together, fixing cabinets to the walls, and installing the draw runners, draw fronts and end pannels. You will need some drill bits ranging from 2mm to 4mm, and a countersink bit.

The cabinets are will packed, though I would have preferred they used cardboard spacer packing rather than polystyrene.

All the cabinets are screwed to each other and to the walls (drill your own holes).

Fo us, levelling the cabinets was easy. The cabinet feet are in 3 parts – a cup that is screwed to the base of the cabinet, a leg piece that is push fit into the cup, and then a foot that is screwed into the leg an is thus adjustable. We eliminated the foot piece altogether for two reasons. Firstly, we have a soffit overhead and by eliminating the foot we can just squeeze in the cabinets, benches and wall cabinets that sit on the benches, with about 10-15mm to spare. Also we wanted lower bench heights because one of our family members is quite short, so a lower bench height is more comfortable. Because the kitchen sub floor is quit flat and level, eliminating the adjustable foot meant that the cabinets were level by default. It just worked out that way. What it does mean though is that I have to rip down the kick rail to fit – quite simple on my table saw.

Small problems with Kaboodle details

Nothing is perfect, and I will list out some of the issues I have found with Kaboodle.

Scratches on doors

We got the vinyl wrap doors, with the heritage profile. The backs of some of the doors have minor scratches. Though not a huge issue, ist a little annoying. I suspect its a packaging and handling issue in the factory.

Stickers don’t come off easily

The backs of the doors have stickers on them. They are a pain in the but to get off. Its obvious that you will want to take them off, so they should use a less aggressive adhesive.

Hinge screw hole inserts don’t grip well

For the euro hinges, there are predrilled holes in both the doors and cabinets. These holes have little plastic inserts in them. I suspect their purpose is to help prevent the small screws from stripping in the MDF and chipboard. The problem is that the screws dont grip in the inserts very well either.

Many of the screws slipped in the inserts. So we have resorted to winding the screws with plumbers teflon tape first, and this is proving to work quite well.

Corner cupboard doors sag a bit too much

There is a bit of weight in a two part corner cupboard door, so the primary door has 3 hinges, which is good. However I have not been able to adjust the hinges well enough to prevent the secondary door from sagging a little. I would prefer to use Hettich hinges on these doors, as I have done on the normal doors. However Kaboodle does not sell Hettich hinges for corner cupboards – go figure. This is an oversight on their part.

You can see in the above picture that the bottom of the secondary door does not line up very well with the cupboard.

Laying a floating floor in the kitchen

Before we install the kitchen, we have to put the floating floor down. I want the flooring to go under the cabinets for several reasons:

  • In case we ever remove the cabinets I want a complete floor covering.
  • The cabinets will help hold the floor in place.
  • Its much easier to lay a floor wall to wall than it is to cut around cabinets.

When I laid the sub floor I made sure it was level and flat, so I know I have a good surface to lay the floating floor on.

First we put down a foam matting which cushions the flooring. The matting also serves as a moisture barrier, but thats not relevant here because I put down a plastic barrier under the sub floor.

I stapled down the foam barrier so it didn’t move around and to help eliminate wrinkles. The foam has a plastic membrane on one side, which acts as the moisture barrier. Normally this is laid plastic side down. We were told by the flooring supplier that if you lay the underlay plastic side up its easier to slide the flooring around if you get it out of alignment. As it turns out we didn’t need to move the flooring, so it didn’t really matter.

There is a little bit of a knack to clicking the flooring together. Our floor uses the unilin click system. I found that the way to do it was to leave the row you are working on slightly tilted up as you tap and click each piece of the row in place until the row is complete, then push the whole row down flat, gently tapping the edge in with a wood block and small hammer where necessary to click it in place.

We placed 10mm spacers around the walls so the flooring has room to expand. End boards were cut on a drop saw. Once you master the clicking mechanism, laying is quite straight forward. You just have to take care to ensure each board is fully seated both on its edge and ends.

Buying a flatpack kitchen – Kitset, Ikea, Kaboodle

Like most households, we need a kitchen. Kitchens are expensive – they are typically the most expensive room in the house unless you do an indoor pool or cinema !

For this workshop/studio that we are building first, a bespoke kitchen could not be justified. I thought about building it myself, as I have the skills and tools, but in the interests of expediency we decided to get a flatpack kitchen, as I have too may other jobs to do.

Which flatpack supplier to use ?

We ended up getting quotes from three vendors – Kitset, Ikea, and Kaboodle. For the kitchen we want, it turns out that they are all roughly the same price, depending on which options you pick, like benchtop surfaces, hardware fittings, and door styles.

Kitset are no longer in business, so that took them out of the equation – luckily we did not order before they went into liquidation.

The Kaboodle cabinets are slightly better than Ikea, in that they have solid chipboard backs rather than ply/masonite/thin mdf. Also, they have the option of using Hettich hardware, which is a better product than their default hinges and draw runners.

Also, Kaboodle is supplied through Bunnings, so its a bit more convenient than Ikea for us.

We did get an in-home consultant from Bunnings to come out and help design the kitchen, which helped quite a bit. We could have figured it out for ourselves, but they know the sizes and product line, so we felt they may be able to suggest things we did not think of.

The Kaboodle sales brochures are actually quite good too, showing all the options, product sizes, and complete kitchen ideas.

So, we went for Kaboodle.

Deciding which components you need

The in-home consultant had provided us with cabinet layouts and 3D renderings, so I then went through it carefully to understand what bits we were going to need. I remeasured the space and changed a few minor details (swapped a packing piece for a slim 200mm cabinet for example).

One thing to note: you need sidepanels on the ends of cabinets where they abut a wall so there is room to open the cabinet door. These panels are relatively expensive when you consider that you only see the edge of the panel and 20mm of the face. So I swapped some of these end panels for kick rail – I’ll just slice up the kickrail as required – much cheaper.

Once we figured out what we wanted we headed down to Bunnings.

Buying the kitchen

Our nearest Bunnings has just relocated to a new store, and its massive, thus its really well stocked. The staff were really helpful, and we selected all the bits and pieces, and what they didn’t have (the Hettich hardware and sink) we placed on order.

I think all up there was about 50 boxes ! This included laundry and bathroom cabinets as well.

Planning for your kitchen

What follows is a series of tips and things to consider when building a house and planning for the kitchen.

Electrical outlets

Plan where you want appliances to go (dishwasher, microwave, stove, kettle, toaster, fridge, etc) so you know where to put power points. For example the microwave and dishwasher power points will probably need to go under the benchtops, so you will need to cut holes in the back of the cabinets.

What I suggest is that you ensure there is extra cable at the back of the power point when the electrician fits off these power points on the wall. Then, when you come to install the cabinets, you take the power point off, drill/cut a hole in the cabinet, poke the wire through the cabinet, and mount the power point onto the inside of the cabinet back, rather then the wall – much neater.

Plan out your cabinet sizes and spacing and ensure that the power points don’t line up with the edge of a cabinet – that will be a real pain to deal with.

For a toaster and kettle, you may want a power point inside a benchtop cabinet.

Plumbing for sink tap and dishwasher fixtures.

Normally the fitoffs for tap fixtures sticks out past the plaster board face just enough to screw on a shutoff valve/tap. However when the cabinets go in these fixtures need to stick trough the cabinet backs as well, which means the fixtures need to poke out an extra 20 to 30mm. This is very easy to forget when you are fixing in the plumbing into the stud walls.

Kitchen taps and window ledges

You will often put the kitchen sing under a window. If you are using timber window frames, you may have a window sill/ledge that protrudes out from the wall face by 20 to 30mm or more.

Just be aware that this may get in the way of your sink faucet. If the faucet mounts behind the sink and the bench is a typical 600mm deep, you may not have enough space for the faucet.

If there is some sort of decorative ledge between the back of the bench and the wall, then you will be OK.

Blocking

You may need blocking in the stud walls to screw things to:

  • Base cabinets
  • Wall cabinets
  • Shelves
  • Range hood

It takes a fair bit of foresight to plan for this, but its worth it. Take photos of all the walls BEFORE the plaster is hung, so you know where the blocking is!

Installing Cornice

Cornice is relatively easy to install, you just have to take a bit of care and not rush it.

Cornice types, sizes and ceiling heights

Here in Australia it comes in a few different sizes, and several profiles. The standard cheep and cheery cornice is 50mm to a side with a simple cove profile. You can then go up in size to 75mm and 90mm coves.

Then, in the 90mm size you can get a number of different decorative profiles, and each of the manufacturers have their own profiles. The profile we chose is called Sydney, from Boral.

The higher your ceiling, the bigger the cornice you need, otherwise it looks a little odd. Cornice is a feature, so make it work for you – don’t choose a tiny cornice profile for high ceilings. We have 9 foot ceilings (2.7m), and 90mm is the smallest I would recommend for ceilings in the 9 – 10 foot range.

Also, in the grand scheme of things, cornice is not that expensive, so don’t skimp. We paid $4.55 per meter for the Sydney profile from Boral.

Tools & Materials

You don’t need many tools for cornice installation:

  • Tape measure and pencil
  • Work platform and step ladder
  • Miter box and saw (I used a small fine tooth panel saw)
  • Plaster mixing tray and spatula
  • Measuring cup

Of course you also need the cornice (it comes in 4.2m lengths), and cornice adhesive. I used the powdered adhesive (add water), not the premixed stuff. The powdered adhesive comes in different grades depending on the setting time – I chose the 45 minute grade.

(need picture of adhesive bag)

Step 1 – Markout

Mark out on the wall and ceiling at the corners or ends of the cornice run, some guide lines to help you align the cornice. I am using 90mm cornice, so I cut a bit of wood 90mm wide by 600mm long as a gauge, and marked some guide lines on the wall and ceiling.

If you don’t use gauge lines it very easy to be 5mm out – ie too far down the wall or too far into the ceiling – and that will mess up your corners.

Step 2 – Measure

Measure the cornice length required. Be accurate but don’t sweat about it. Unless your walls and ceilings are exactly 90 degrees to each other, the cornice corners will need a bit of filling, so a few millimetres out wont matter.

Note: I found by trial and error that I really can handle much more than about 8 foot (2.4m) of cornice by myself. I know the pros can, but I dont have the speed to lay out the adhesive and get it up and in position before it starts to set. Also, my work platform is not long enough to allow me to walk along and place more than about 8 foot of cornice in one go. So, for long runs, I just put up with doing joins and getting them as neat as I could.

Step 3 – Cut

Use your miter box to cut the cornice. Assuming you are dealing with walls that are at right angles, you will need to cut 45 degree miters on all the corners. You will probably have two types of corners – internal and external.

What I did to help me cut the correct angles was make up four bits of scrap cornice with the correct cuts on them – internal left and right hand ends, and external left and right hand ends. It might take you a few goes to get these ‘templates’ the right way around, but when you have, label them, and also label which way around in the miter box they go.

(need photo of 4 templates)

When you cut cornice in the miter box, the ceiling edge of the cornice goes to the bottom of the miter box (ie its upside down). Thats why it pays to label your templates with the edge that faces up when you do the cutting.

I also labeled them with an arrow pointing to where the good side (ie working side) of the workpiece faced, just so I made sure I orientated everything correctly. As a consequence, I did not make a single cutting mistake.

I also found it handy do set up two sawhorses (trestles) with a long (3 meters plus) plank between them. This was my cutting table. I also had a couple of 20mm high blocks to prop the cornice up so it would sit flat in the miter box.

Step 4 – Test fit

Always do a test fit. You will find that you need to shave of a few mm here and there, and you don’t want to do it with glue on the workpiece.

Step 5 – Mix adhesive and lay it out

After some trial and error I found that 225ml of water (I had a plastic drinking cup that was that capacity) mixed with adhesive powder to a thick toothpaste consistency would do about 1.5 meters of cornice (both edges).

Put the water in your mixing tray, and sprinkle the powder in letting the water soak into the powder. The more you mix it, the faster it dries, so if you let the water soak in as you add powder slowly, you have less mixing to do, thus it will give you more working time.

I used a 30mm wide spatula to lay the adhesive onto the cornice in a thick wide bead, covering the flats of the cornice. The pro’s use an 8″ or 10″ plastering knife, but I’m not that good.

I used my cutting plank to sit the cornice on while I glued it up, with the edge of the cornice hanging slightly over the plank edge. Then flip the cornice and do the other edge.

Note: Don’t be a hero and do multiple pieces at once, unless they are quite short. I tried this the first time, and the glue dried before I got to the second piece, so I just wasted a bunch of adhesive.

In general you do waste a bit of adhesive, but thats a small price to pay verses rushing it and having it dry on you before a piece is properly in place.

Step 6 – Put the cornice in place

Orient the cornice the right way around and pick it up, with your arms wide spread and the cornice sitting on your upturned hands – top cornice edge closes to you, and back (glue side) facing upwards.

Walk up your step ladder and onto your work platform.

Put the cornice in place, following your guide lines.

Now just work your way along the cornice pushing it into the wall and ceiling. Keep alternating from end to end to ensure it doesn’t droop off the ceiling. The adhesive will set up relatively fast if you have the consistency right. Make sure its push up to and end or the piece it has to mate with. Pay attention to any joins to get them mating as best as you can. Take care here – you want it looking good.

On the joins I then use my finger to smear adhesive into the gaps, and blend the join.

Now you can use your putty knife to scrape off the excess, and fill in any little gaps between the wall and cornice, and the ceiling and cornice. Be neat here, so there is minimal or no sanding to be done.

Step 7 – Next piece

Return to step one and repeat.

Handling visible ends

Where a cornice end would be visible, you need to cap it with a small external return piece.

This is actually quite easy to do, you just need to take care in the cutting, particularly if you are using decorative cornice, as its easy to tear of the tiny little end of the miter cut.


Hydronic pipework

We are installing three hydronic radiators up stairs, which will be powered by the hot water service (which in turn will be powered by a wetback on the wood fireplace).

I am running the pipework for the hydronics under the upstairs floor (ie in the ceiling of the ground floor). I have chosen not to use the special hydronic insulated tubing, but rather Sharkbite poly tubing with manually fitted foam tube insulation, as the ceiling space is insulated, thus all the pipework is inside an insulated space in an insulated building.

The pipework will poke up through the floor to meet the radiators.

Window hinge mortises

Notice the notch at the top of the mortise. This is what happens if your router base plate is not square (as in a rectangular plate). I was using a jig I had made to guide the router, but because the router base plate is slightly rectangular, if I forget to flip the router around 180 degrees when I get to the opposite end of the jig, the router will cut in further than intended.

The solution is to spend the time to make a square – or better yet round – baseplate for the router. That way, it doesn’t matter how the router is orientated, it will always follow the jig properly.