
This is why I dont like using 1/4″ routers – the bits snap easily.
Carbide is brittle and I accidentally knocked the spinning bit as I lifted the router out of the hinge mortising jig.
$30 down the drain.
Phil & Dianne's house building diary

This is why I dont like using 1/4″ routers – the bits snap easily.
Carbide is brittle and I accidentally knocked the spinning bit as I lifted the router out of the hinge mortising jig.
$30 down the drain.
I had to carefully design the width of the windows, as there are a number of components to consider, as mentioned here.
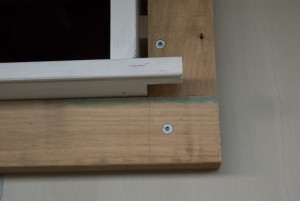
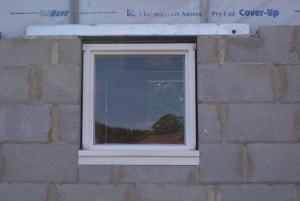
So when it comes time to install a window, I need to put a ‘frame’ of 90x45mm timber around the window so that the weatherboards and window trim abut the window at the correct depth.
(note: need drawing here)
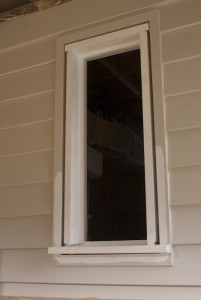
As you can see in this photo, I have installed the 90×45.
 |
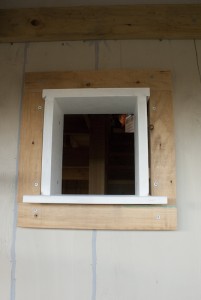 |
I chose to fix the 90×45 into the framing studwork behind the sheeting with 100mm screws, rather than nail it.
38x45mm cement sheet window trim will be fixed to this subframe, directly abutting the window frame, which will leave 45mm for the weatherboard fixing.
The second window to get built and installed is for the storage room. This window is more or less the same as all the other windows in the house. The difference between this and the window in the garden shed is that the sill has horns.
These horns extend the sill either side of the jams, and are mostly decorative in nature. Because the sill overhangs the weatherboards, the architrave cannot be carried across the bottom if the window. So the architrave must abut the sill, and the horns provide a place for this abutment.
I may choose to put an apron under the sill – I have not decided yet.
Prior to assemble, where the jams join the head and sill, I have applied two coats of paint to protect the timber.
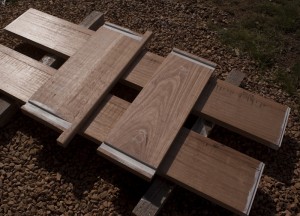
The window is then assembled using three 75mm screws per joint.
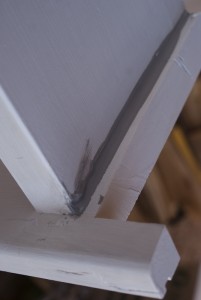
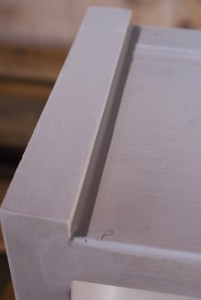
Here is a closeup showing the drip groove cut into the front underside of the sill. This grove is cut with a few passes on the tablesaw, with the blade set very low (about 6mm).
Any holes, checks etc are filled with putty, then the window is painted with three coats of 3-in-1 undercoat/sealer/primer.
Just prior to installation, the exterior joint intersections are sealed with polyurethane to stop water seeping into the joints.
 |
 |
Installing the window is a case of sitting it in place, then shimming the sides to make it plumb. I am fixing the window in place with screws in the jams. I am screwing through the jams into the frame studs. The screws will be hidden bu the glazing/sash mouldings, so I have to take care to put the screws where the moulding wil hide them. The alignment shims are placed at the screw positions, and act to chock the jams where the screws go through so the jams dont get pulled out of shape.
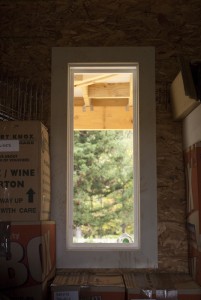
Once the window is in place I put some architrave on the inside. As this is a store room I just used MDF architrave stock that I was given by a neighbour.
 |
 |
The garden shed window is the first window to be assembled, because its the smallest.
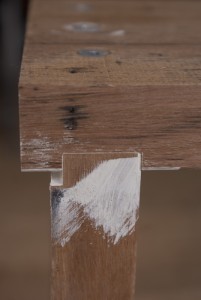
The core widow frame is just a sill and head, each with rebates to house the jams.
The head and jams are 221mm wide buy about 33mm thick. The only reason they are that thick is because thats the timber that was delivered to me, even though I asked for 25mm rough sawn. There is no point in making it thinner, other than surface planing to straighten the exposed face.
The jams have to be jointed together, because the timber is 190mm wide. So I need to joint on another 30mm. A real pain. It makes the whole process take so much longer. These joints are not using biscuits – I could not see the point. Also I am using Titebond III PVA glue rather than epoxy, so I can get quicker clamp-up times, and because I will orient this joint to the inside so it will not be exposed to the weather.
I am housing the jams into the rebates so to help eliminate twisting over time.
 |
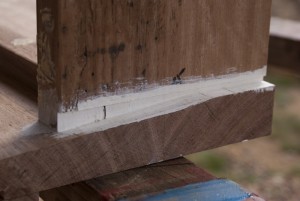 |
All the joints are getting two coats of primer/sealer/undercoat prior to assembly. I then use three 100mm type 17 screws on each joint.
In the case of this window I need to add an apron piece below the sill to match up to some existing brickwork on the shed. The apron was biscuited and glued on.
The whole frame will then get three coats of undercoat both inside and out. The reason for undercoating the outside (ie the bit thats hidden by the window frame) is to stop moisture ingress into the frame. Timber warps less if all sides are coated evenly.
 |
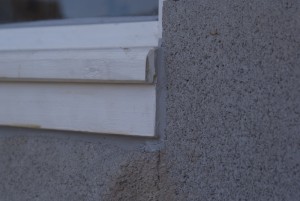 |
The ends of the weatherboards, where they meet the corner/end-cap trim, needs to be sealed with polyurethane prior to painting, for weatherproofing.
This is essential, but a pain to do. Its hard to get it neat on the under edge of the boards, and its a bit tedious. Oh well, you’ve just gor to do it right if you want things to last.
I tried several tools to smooth out the goo, but in the end a finger is the best. All the nail in the trim needs to be punched in and filled also. I am using a exterior filler that is sandable and paintable.
I have finally started making windows, and the sills are the first step. This has been a long time coming, and I have a heap of work ahead of me for the windows. Before we started the house we had decided to make our own windows, because the cost of buying professionally made windows was just way too expensive. It was going to cost us $30,000 for double glazed windows for the workshop, and $39,000 for the house – and that was the cheeper end of the quotes we got. The most expensive was $60,000 just for the workshop!
We want timber windows. Primarily for the aesthetic, but also because of the thermal properties of wood. Whilst PVC windows are probably the best thermally, I do not particularly like them, and am not even sure if we could get BAL-29 rated PVC windows. Not a huge fan of aluminium windows either – they would not suite the look of the house, and we would have to get aluminium clad wooden wooden frames because AL is a terrible insulator. These would prove to be expensive also.
So, timber it is; and we must pick from a list of 7 timber species that have been fire rated and found suitable for BAL-29 and above. We have ended up with Silvertop Ash. Whilst in many cases it looks like Vic Ash, its much heavier.
The window frames need to be 221mm wide to suite the walls we are making. It works out like this:
So the sills need to be 250mm to cater for the horns on weather ends of the sill that the window moulding will sit on, and to provide a weather lip over the weatherboards.
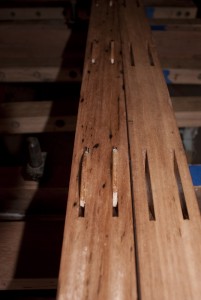
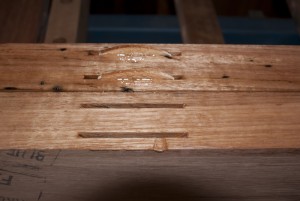
Each sill is made from two pieces of 140 x 45mm stock that is edge jointed together. I am using a router with a straight bit and a 24″ jointer hand plane to do the jointing. Then I put in two rows of biscuits to align them, however in hindsight one row would have been fine. The reason I say this is because when planing the bevel on the sill on some boards I exposed the biscuits because they were too close to the finished surface.
 |
 |
I am using a West Systems epoxy glue for the sills because the join will be exposed to the weather (under paint). I am finding the epoxy easy to work with because it has a relatively long open time when compared to a PVA like Titebond. However the disadvantage is a very long cure time in clamps (8 – 12 hours). With the clamps I have I can only clamp up 2 long sills at a time. Note that epoxy is a gap filling glue, so you do not need to clamp up as tightly as you do for PVA. I brush the epoxy on with a disposable brush.
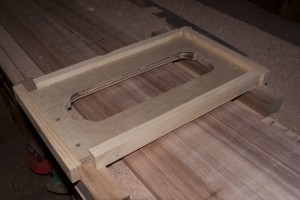
Once out of the clamps the shaping can begin. I have made up a simple sled for my router that rides on a track consisting of an MDF base and two pine rails.
 |
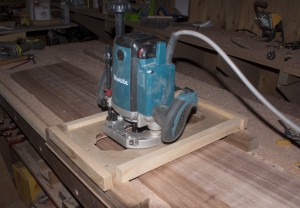 |
I am using a 3 horsepower Makita router, with a surface planing bit. The bit has 3 replacable carbide inserts, so I get 4 cutting edges per insert before I have to replace or sharpen the inserts. This bit and router combination work very well, and I get only very minor ‘tracks’ in the planed surface which can be belt sanded out.
Whilst I have a thicknesser capable of handeling this size timber, its no good to me because neither surface of the glued up plank is perfectly flat. So running it through the thicknesser would only produce a twisted board out the other end.
Therefore I sit the glued up stock on my sled base, and use small timber wedges to shim out any wobble in the board. Then I surface plane one face, flip it over and surface plane the other face. Once the first face is planed true, I could run it through the thicknesser for the other face. However I am already set up with the router so I just continue on with it on the other face.
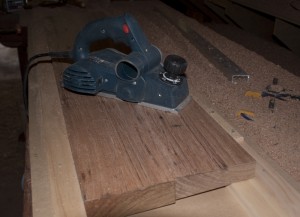
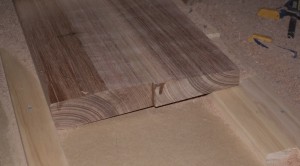
To put the bevel on the main face, which is about 90mm wide, I use my electric planer to rough it in, then set a chock piece under one edge and again use the sufrace planer in the sled.
 |
 |
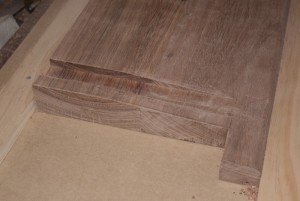
Then I need to cut out the horns at either end, and route a rebate at either end to house the jambs.
 |
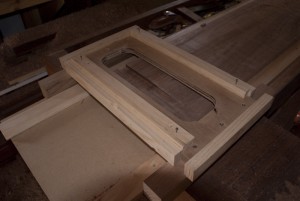 |
The rebates are cut with the router, using a straight cut bit. I again use the sled, clamping it in position on the table. I have fixed side rails to the sled that the router base runs up to, to control the width of the rebate. The rebate is cut only as long as the jambs are wide – 221mm.
I also hand plane a radius on the front edge of the sill, just because I think it looks nicer.
The final step is to cut a drip channe under the front edge using the table saw.
And thats how I make the sills.
The very first weatherboards went up today. Very exciting. They were installed on the storage area under the deck.
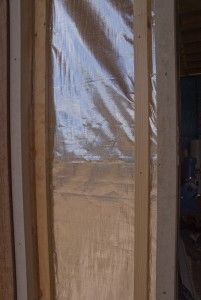
The first wall I tackled was probably the hardest of the storage area – the doorway wall. I needed to do a bit of prep on this wall because I realised that I had extended the floor about 20mm further out from the wall than I should have, because I want the first weatherboard to go below the decking that will run under the veranda.
So I had to pack out this wall by 20mm with pine furring strips.
 |
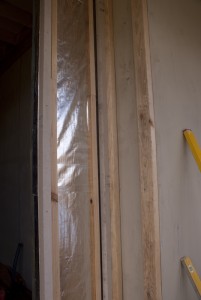 |
Luckily I had some 20×40 pine strips, but not quite enough, so I hade to machine up a bit more on the bandsaw and thicknesser.
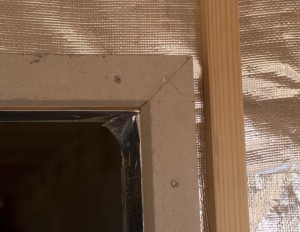
I have decided to use 38x45mm trim for the weatherboards. The other size available to go with the Linea weatherboards we have chosen is 38×90. However this larger size is a fair bit more expensive, and would require more packing in the framework behind to support it and the weatherboards, so I dont think its worth it. This smaller trim will go on the internal corners and around the doors and windows. I will still have to use the wide trim on the external corners, because I will need the extra width for nailing to fix it in place as it needs to extend out 38mm pas the wall frame so the weatherboards can but into it.
As part of the prep I needed to put in a batten for the soffit lining.
When installing the internal corners (and external ones later on), because the soffit ins not yet in place i need to allow an 8mm gap between the top of the corner pieces and the soffit battens so the soffit lining can slide into place.
Its hard to get the corner mitres exactly right, so some putty will come into lay here. Even though most of it will be covered by architraves, we still need to be as neat as possible.
 |
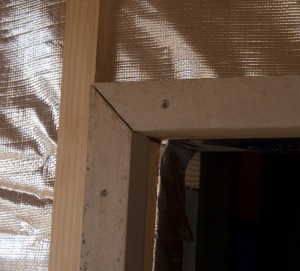 |
I used 75mm bullet head nails to hold the corner and door trim pieces in place. I pre drilled holes first using a 3.5mm masonry bit. I didn’t like the chances of the nail gun punching through the trim. Also, the head of the nails on the gun would be too hard to punch below the surface so we can cover them with putty.
BTW, I will be using an exterior grade flexible putty to fill the holes, and the gaps in the mitres.
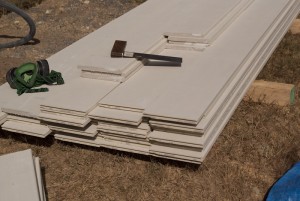
Here is the pile of weatherboards. Now we need to put them up!
The first one goes up. Its not a big one, but its a critical one, because the height of this board sets the bottom edge height for the entire building. Hope its right !
Note: If the board is a tight fit, its very easy to peal a bit off the front face of the board. So, use a bit of timber held right up against the vertical edge on either side as a tapping piece to support the front face of the board as you tap it in place.
I am using 50mm galvanised nails in the nail gun to put up the boards.
And here is the wall so far.
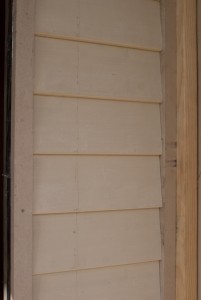 |
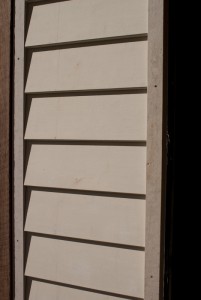 |
The deck has been up for some time, and the cement sheet used for the deck flooring really should be protected from the weather. So this weekend Dianne gave it a coat of primer and the first coat of sealing membrane. All the corners and wall/floor junctions get a flexible membrane joiner too, so water cannot get between the wall and the deck.
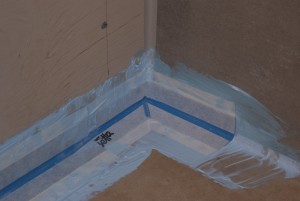 |
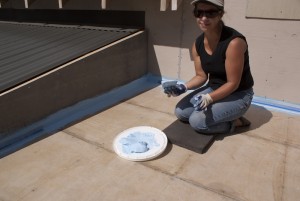 |
So the primer goes on first to act as a bonding agent between the cement sheet flooring and the subsequent membrane layer. This stuff is very watery, and the coverage is really good – about 1 liter per 16 sq meters. Then the first coat of membrane goo goes on. Coverage is not so good – a 15kg bucket did one coat, which is about 34 sq meters.
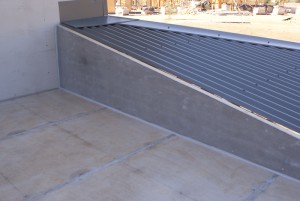
Prior to Dianne doing this job I framed and sheeted the two ends where the deck meets the veranda roof.
 |
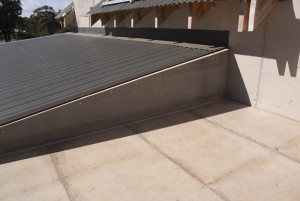 |
I faced these ends in 8mm cement sheet. I wanted a thick sheet just in case it gets kicked as people lean on the balcony railing.
There will be some roofing flashing that covers the top edge of these end pieces.